Snap
How to Execute
You can change Snap Mode and Snap Type settings in the screen toolbar.
Snap Mode
| Icon | Item | Action |
|---|---|---|
| Auto | Automatic snapping when the mouse cursor is not moving on the screen. | |
| On | Snap when click on screen. | |
| Off | Does not snap. |
Snap Type
| Icon | Item | Action |
|---|---|---|
| All | Snap for all types. | |
| Point | Snap to a vertex. | |
| Cross Point | Snap to a point where figure edges intersect. | |
| Line | Snap to a line segment. |
Targets and Priorities
Snap targets are figure edges, chip lines, marks, or grids. Snaps to points (vertices, intersections) have priority over snaps to lines. Also, snapping to hidden objects is not performed. Even if you specify a snap to “Cross Point”, chip lines and intersections of chip lines and figure edges will not be snapped to.
Show Snap Position
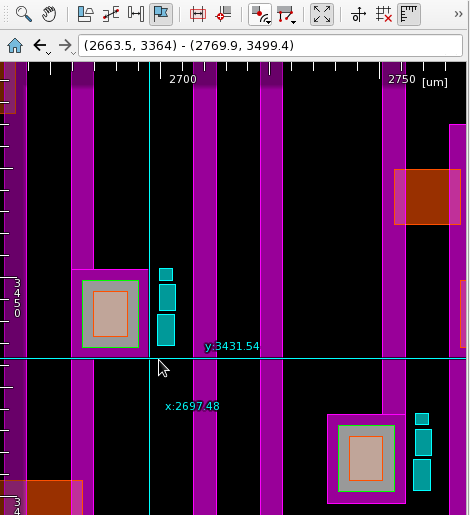
You can check the snap position before clicking with the following
- Set
Snap Modeto Auto. - Press the q key on screen.
Set Snap Mode to Auto
If you set Snap Mode to Auto and make the cursor stationary on screen for a certain time, the snap position will be displayed.
The delay before displaying the snap position can be changed in the settings. See Auto Snap Dwell Time in Preference Action/Snap page.
Since the snap range is determined in pixels, the point to which snapping is applied differs depending on the screen zoom ratio. See Snap Range in Preference Action/Snap page.
Press the q Key on Screen
Pressing the q key on screen will display the snap position regardless of Snap Mode.
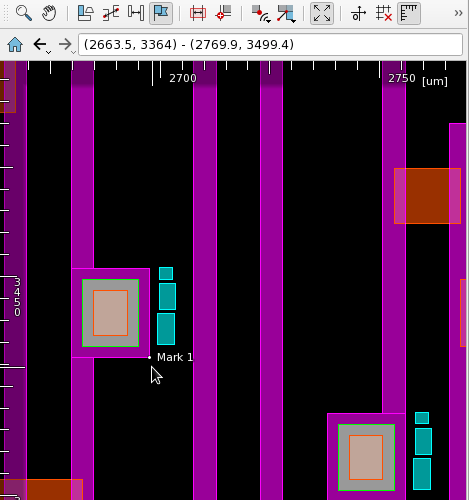
Usage Examples
For example, in Add Mark mode, you can create a mark on the corner of a figure by left-clicking with snap enabled.
Related Settings
You can change the snap settings by changing the preference. See preference Action/Snap page for detail.